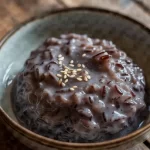
I finally nailed the Best Beef Bone Broth; it makes soups, grains, and sauces taste like they simmered all day without any drama.

I’m obsessed with this soup-broth hybrid, the stuff I reach for when dinner needs substance and my fridge needs honesty. I love that it tastes like long, slow time even when I cheat and make Beef Broth Recipes Easy.
It’s rich but clean, bone-deep flavor that wakes up roasted meat and soothes a rough night. I brag about it as the Best Beef Bone Broth because no shop jars hit this depth.
Garlic cloves, smashed, and parsley stems give it bright notes without trying too hard. Thick, gelatinous, happy in a bowl.
Yes, I hoard it and refuse to share.
Ingredients

- Beef bones: rich, gelatinous depth and real beefy mouthfeel.
- Cold water: the base that pulls all the goodness out.
- Onion: sweet oniony backbone, adds savory background notes.
- Carrots: little sweetness and body, keeps it homey.
- Celery: subtle green bite, balances the richness.
- Garlic: garlicky punch, warms and rounds the broth.
- Bay leaves: herbal hint, gives calm aromatic lift.
Plus adds depth.
- Peppercorns: peppery pops, keeps it from tasting flat.
- Apple cider vinegar: draws minerals, brightens the savory notes.
- Salt: seasons smartly, I usually add more at the end.
- Parsley stems: fresh green lift, you won’t overdo herbiness.
- Tomato paste: adds color and a little umami kick.
Basically concentrated.
Ingredient Quantities
- 4 to 6 lb (1.8 to 2.7 kg) beef bones, mix of marrow, knuckle and meaty bones (oxtail or shank if you can)
- 3 to 4 quarts (3 to 4 L) cold water, enough to cover bones
- 1 large onion, halved (no need to peel)
- 2 carrots, scrubbed and roughly chopped
- 2 celery stalks, roughly chopped
- 4 garlic cloves, smashed
- 2 bay leaves
- 1 tbsp whole black peppercorns
- 2 tbsp apple cider vinegar (helps draw minerals from the bones)
- 1 tsp kosher salt, plus more to taste (optional, I usually add at end)
- 4 to 6 sprigs fresh parsley or 1 small bunch parsley stems
- 1 tbsp tomato paste (optional, for extra color and depth)
How to Make this
1. Preheat oven to 425F. Spread the bones on a rimmed baking sheet, roast 30 to 45 minutes until well browned, turning once; this gives deep flavor, dont skip it if you can.
2. Transfer bones to a large stockpot or slow cooker, pour in cold water to cover by about an inch (3 to 4 quarts usually), add apple cider vinegar and let sit 20 to 30 minutes before heating; the vinegar helps pull minerals out of the bones.
3. Add the halved onion (no need to peel), carrots, celery, smashed garlic, bay leaves, peppercorns, parsley stems, tomato paste if using, and 1 tsp kosher salt; the tomato paste can be browned briefly in a skillet first for extra color if you like.
4. Bring to a gentle simmer over medium heat, then lower to barely a simmer and skim off any foam and impurities that rise to the surface for the first 30 to 60 minutes.
5. Reduce heat to low and simmer very gently: 12 to 24 hours on the stovetop or 24 to 48 hours in a slow cooker on low; longer cooking extracts more collagen and nutrients, but check occasionally and add water to keep bones covered.
6. About halfway through, taste and add more water if needed, and adjust heat so it never boils hard; a rolling boil will make the broth cloudy and greasy.
7. When done, remove from heat and fish out the large bones and vegetables with tongs or a slotted spoon, then strain the broth through a fine mesh sieve or cheesecloth into a large bowl or pot to remove small solids.
8. Let cool slightly, then refrigerate uncovered until fat rises and solidifies on top, usually a few hours or overnight; skim off fat if you want a leaner broth, or reserve it for cooking.
9. Reheat gently, season to taste with more kosher salt, and use right away, or portion into jars and freeze for up to 6 months; the broth will gel when cold if you extracted enough collagen, that is a good sign.
10. Label and date your jars, and remember this broth is great on its own for sipping, as a base for soups, stews, risotto or to cook grains, gives everything extra warmth and nourishment.
Equipment Needed
1. Rimmed baking sheet for roasting the bones, lined with foil or parchment if you like
2. Large stockpot or slow cooker to simmer the broth (your choice)
3. Cutting board and a sharp chef’s knife for chopping veg and halving the onion
4. Tongs and a slotted spoon to remove bones and skim the scum
5. Fine mesh sieve and/or cheesecloth to strain out small bits
6. Large heatproof bowl or another pot to catch the strained broth
7. Wooden spoon or ladle for stirring and scooping while it simmers
8. Jars or freezer-safe containers for cooling, storing and labeling the finished broth
FAQ
Homemade Beef Bone Broth Recipe Substitutions and Variations
- Beef bones (4 to 6 lb): use a mix of chicken carcasses or pork neck bones if you dont have beef, you will get lighter flavor but still rich stock.
- Apple cider vinegar (2 tbsp): swap with white wine vinegar or a squeeze of lemon juice to help pull minerals from the bones.
- Tomato paste (1 tbsp, optional): try a spoon of miso or a small roasted red pepper puree for color and umami instead.
- Fresh parsley (sprigs or stems): replace with fresh thyme or a few rosemary sprigs for a different herb note, but use less rosemary cause it’s stronger.
Pro Tips
1. Roast those bones longer than you think you need to, especially the meaty ones. If they get well browned the broth will taste way deeper and not flat. Don’t be shy about scraping up the browned bits from the pan into the pot, they’re full of flavor.
2. Use cold water and let the vinegar sit with the bones for at least 20 minutes before heating. It really helps pull out minerals. Also top the pot off with hot water during long cooks instead of cold, so you won’t drop the temp and risk a boil.
3. Keep it at a whispering simmer. If it bubbles hard you lose clarity and you’ll wind up with greasy broth. If foam builds up at the start, skim it, but don’t obsess about getting every last speck.
4. Chill the finished stock overnight and save the fat. That fat makes killer fried rice and roasted veggies and you can mix a spoonful into sauces for richness. If the broth gels cold you did it right, but even if it doesn’t don’t bin it, it still tastes great.

Homemade Beef Bone Broth Recipe
I finally nailed the Best Beef Bone Broth; it makes soups, grains, and sauces taste like they simmered all day without any drama.
6
servings
70
kcal
Equipment: 1. Rimmed baking sheet for roasting the bones, lined with foil or parchment if you like
2. Large stockpot or slow cooker to simmer the broth (your choice)
3. Cutting board and a sharp chef’s knife for chopping veg and halving the onion
4. Tongs and a slotted spoon to remove bones and skim the scum
5. Fine mesh sieve and/or cheesecloth to strain out small bits
6. Large heatproof bowl or another pot to catch the strained broth
7. Wooden spoon or ladle for stirring and scooping while it simmers
8. Jars or freezer-safe containers for cooling, storing and labeling the finished broth
Ingredients
-
4 to 6 lb (1.8 to 2.7 kg) beef bones, mix of marrow, knuckle and meaty bones (oxtail or shank if you can)
-
3 to 4 quarts (3 to 4 L) cold water, enough to cover bones
-
1 large onion, halved (no need to peel)
-
2 carrots, scrubbed and roughly chopped
-
2 celery stalks, roughly chopped
-
4 garlic cloves, smashed
-
2 bay leaves
-
1 tbsp whole black peppercorns
-
2 tbsp apple cider vinegar (helps draw minerals from the bones)
-
1 tsp kosher salt, plus more to taste (optional, I usually add at end)
-
4 to 6 sprigs fresh parsley or 1 small bunch parsley stems
-
1 tbsp tomato paste (optional, for extra color and depth)
Directions
- Preheat oven to 425F. Spread the bones on a rimmed baking sheet, roast 30 to 45 minutes until well browned, turning once; this gives deep flavor, dont skip it if you can.
- Transfer bones to a large stockpot or slow cooker, pour in cold water to cover by about an inch (3 to 4 quarts usually), add apple cider vinegar and let sit 20 to 30 minutes before heating; the vinegar helps pull minerals out of the bones.
- Add the halved onion (no need to peel), carrots, celery, smashed garlic, bay leaves, peppercorns, parsley stems, tomato paste if using, and 1 tsp kosher salt; the tomato paste can be browned briefly in a skillet first for extra color if you like.
- Bring to a gentle simmer over medium heat, then lower to barely a simmer and skim off any foam and impurities that rise to the surface for the first 30 to 60 minutes.
- Reduce heat to low and simmer very gently: 12 to 24 hours on the stovetop or 24 to 48 hours in a slow cooker on low; longer cooking extracts more collagen and nutrients, but check occasionally and add water to keep bones covered.
- About halfway through, taste and add more water if needed, and adjust heat so it never boils hard; a rolling boil will make the broth cloudy and greasy.
- When done, remove from heat and fish out the large bones and vegetables with tongs or a slotted spoon, then strain the broth through a fine mesh sieve or cheesecloth into a large bowl or pot to remove small solids.
- Let cool slightly, then refrigerate uncovered until fat rises and solidifies on top, usually a few hours or overnight; skim off fat if you want a leaner broth, or reserve it for cooking.
- Reheat gently, season to taste with more kosher salt, and use right away, or portion into jars and freeze for up to 6 months; the broth will gel when cold if you extracted enough collagen, that is a good sign.
- Label and date your jars, and remember this broth is great on its own for sipping, as a base for soups, stews, risotto or to cook grains, gives everything extra warmth and nourishment.
Notes
- Below you’ll find my best estimate of this recipe’s nutrition facts. Treat the numbers as a guide rather than a rule—great food should nourish both body and spirit. Figures are approximate, and the website owner assumes no liability for any inaccuracies in this recipe.
Nutrition Facts
- Serving Size: 240g
- Total number of serves: 6
- Calories: 70kcal
- Fat: 4g
- Saturated Fat: 1.5g
- Trans Fat: 0g
- Polyunsaturated: 0.4g
- Monounsaturated: 1.8g
- Cholesterol: 30mg
- Sodium: 400mg
- Potassium: 200mg
- Carbohydrates: 3g
- Fiber: 0.5g
- Sugar: 1.5g
- Protein: 8g
- Vitamin A: 3400IU
- Vitamin C: 3mg
- Calcium: 40mg
- Iron: 1mg


![Thai Coconut Soup [Coconut Milk Soup] Recipe](https://bangkokbowl.com/wp-content/uploads/2025/06/Collage_Thai-Coconut-Soup-Coconut-Milk-Soup-_1751036922-150x150.webp)