
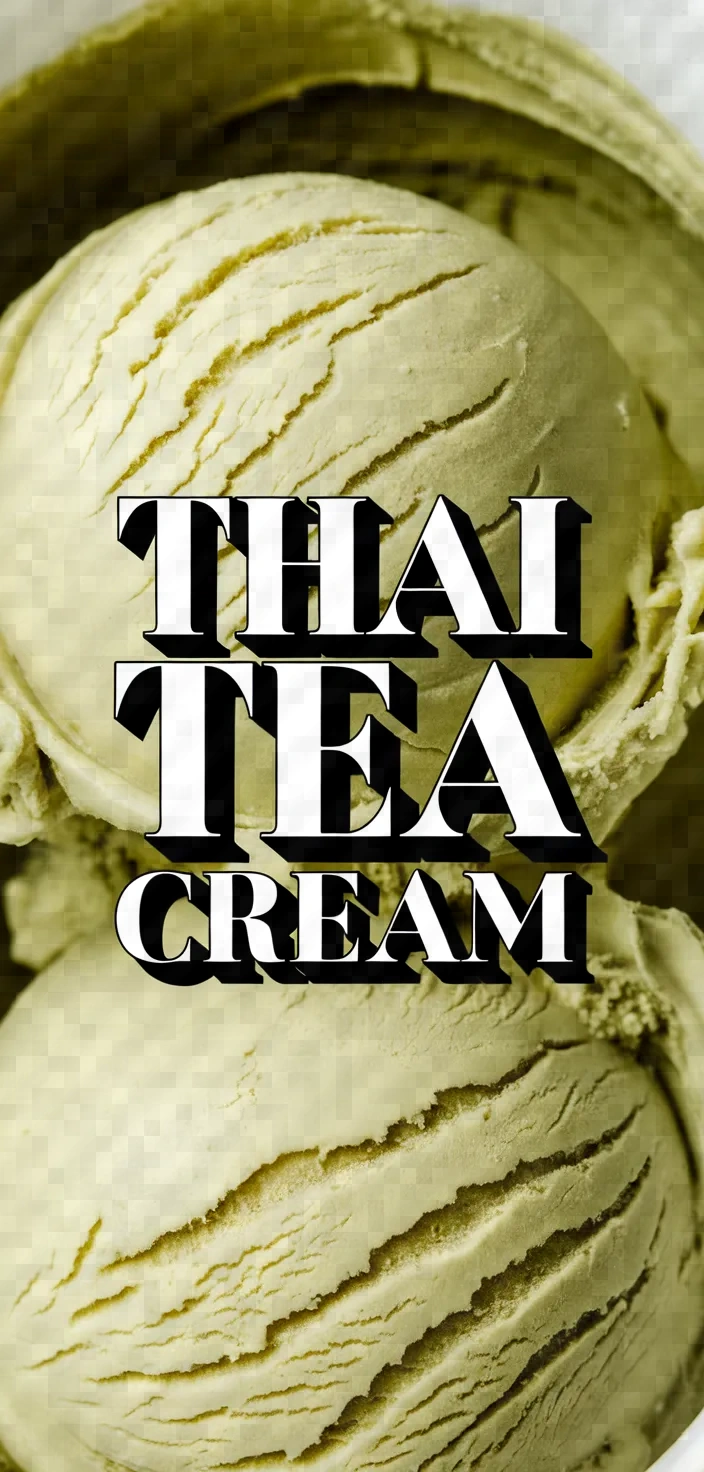
This recipe for homemade Thai tea ice cream is my absolute favorite because it perfectly blends the rich, creamy texture with the unique, aromatic flavor of Thai tea, creating an indulgent treat that’s both different and familiar. Plus, there’s just something so satisfying about crafting this dessert from scratch, knowing each step brings me closer to a scoop of that vibrant, dreamy goodness.
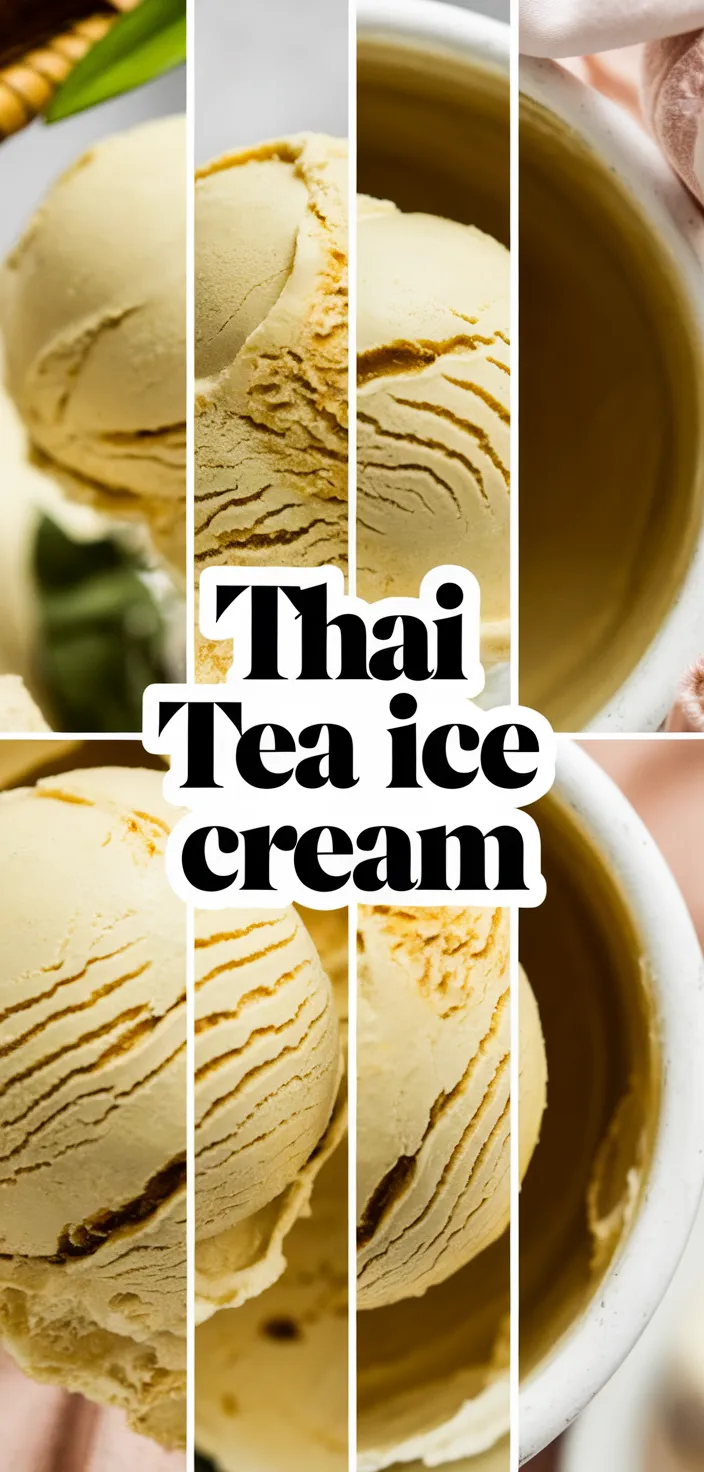
Welcome the delicious combination of strong flavors with my recipe for Thai tea ice cream. The drink itself has a creamy base, so I used 2 cups of heavy cream and 1 cup of whole milk to give the ice cream that same luscious mouthfeel.
Thai tea is intensely fragrant (as well as flavored). I used 3/4 cup of tea leaves and allowed them to steep for a good long time to get the maximum amount of flavor.
Ingredients
Whipping Cream: Heavy cream can be used in place of whipping cream in any recipe.
Whole Milk: Creates smoothness while balancing richness.
Tea Leaves Thai: Provides real, strong tea taste.
Sugar, granulated: Beautifully sweetens and enhances flavors.
Yolked Eggs: Enrich the base and thicken it.
Vanilla extract lends sweetness and warmth, along with an aromatic quality.
Salt: Heightens flavors, perfectly balancing sweetness.
Food Coloring Orange: Provides a bright customary look (not mandatory).
Ingredient Quantities
- 2 cups heavy cream
- 1 cup whole milk
- 3/4 cup Thai tea leaves
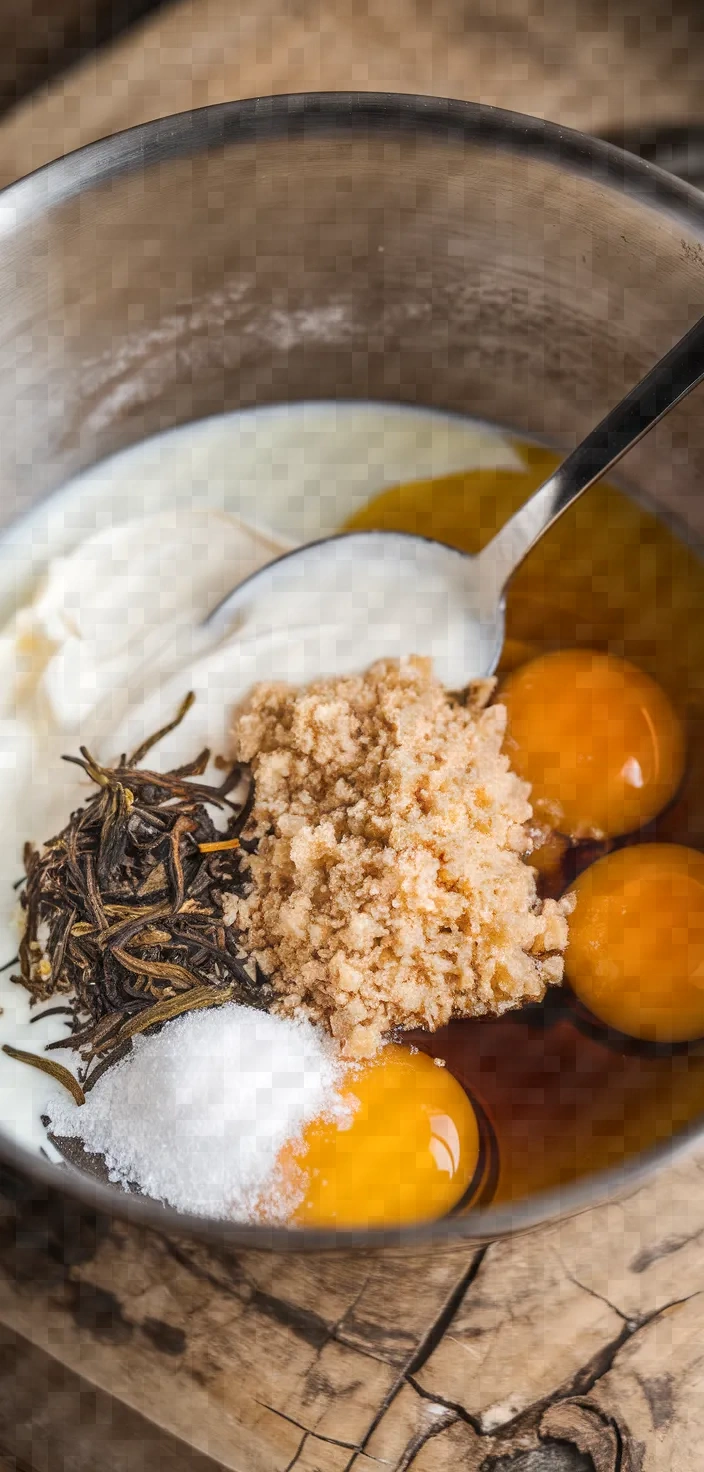
- 1 cup granulated sugar
- 5 egg yolks
- 1 teaspoon vanilla extract
- 1/4 teaspoon salt
- Optional: 1-2 drops of orange food coloring
Instructions
1. In a saucepan, mix the heavy cream and whole milk. Heat over medium until it begins to steam but do not let it boil.
2. Add the leaves from the Thai tea to the cream mixture. Take the pot off the heat, cover it, and let the tea steep in the cream for half an hour.
3. Pour the mixture through a fine-mesh sieve or cheesecloth into a clean bowl, pressing on the leaves to extract as much liquid as possible. Discard the tea leaves.
4. Infused cream mixture goes back into the saucepan. Add granulated sugar. Heat gently and stir until the sugar dissolves completely.
5. In another bowl, whisk the egg yolks. Gradually add in a cup of the warm cream mixture, whisking constantly to ensure the yolks do not cook.
6. Return the egg yolk mixture to the saucepan containing the cream mixture. Place over low heat and stir constantly until the mixture thickens enough to coat the back of a spoon (about 170°F).
7. Take from the heat and mix in the vanilla extract and salt. If you want colored caramel, add orange food coloring and mix until the color is evenly distributed.
8. Pour the custard through a fine-mesh sieve into a clean bowl to remove any bits of cooked egg.
9. Allow the mixture to cool to room temperature, then cover and refrigerate for a minimum of 4 hours, or overnight, until completely chilled.
10. Churn the custard that has been chilled in an ice cream maker per the manufacturer’s directions. After it has been churned, place it in a container with a lid, and force it to a few hours of a deep freeze before serving, as this will yield the firmest product.
Equipment Needed
1. Saucepan
2. Fine-mesh sieve or cheesecloth
3. Clean bowls (at least two)
4. Whisk
5. Spoon
6. Thermometer (optional, for checking 170°F)
7. Ice cream maker
8. Container with a lid (for storing frozen product)
FAQ
- Can I use a different type of milk instead of whole milk?Certainly, you can swap out whole milk for either 2% milk or a non-dairy substitute such as almond milk, but there may be a slight impact on the flavor and texture of the ice cream.
- What if I don’t have Thai tea leaves?Substitutes can be used, like Thai tea bags. If you use them, you’ll want around 6-8 bags for the same result. An important note when making Thai iced tea is to steep the tea for a sufficient time to really pull out the flavor and color.
- How important is orange food coloring for this recipe?Food coloring is not required and only has a visual effect. Traditional Thai tea has a bright color, but the taste is unaffected if the color isn’t there.
- Can I make this recipe without an ice cream maker?Indeed, once the custard is thoroughly mixed, it should be allowed to cool, then transferred to a shallow vessel suitable for the freezer. Once in the freezer, the custard base must be stirred every half hour until the desired consistency is achieved.
- How long should I steep the tea leaves?Allow the Thai tea to steep in the milk and cream for about 30 minutes to obtain a rich and full-flavored infusion.
- Is it possible to reduce the sugar content?If desired, you can reduce the sugar to 3/4 cup, but note that it might slightly alter the sweetness and texture of the ice cream.
Substitutions and Variations
2 cups heavy cream: substitute with 1 cup milk and 1 cup butter (for a similar fat content)
One cup of whole milk: substitute with one cup of coconut milk (for a rich, creamy alternative).
1 cup granulated sugar: substitute with 3/4 cup honey or 3/4 cup maple syrup (for a natural sweetener)
5 egg yolks: replace with 5 tablespoons cornstarch (for a thickening agent devoid of eggs)
1 teaspoon vanilla extract: substitute with 1 teaspoon almond extract (for a different flavor profile)
Pro Tips
1. Steeping Time and Flavor You can adjust the steeping time of the Thai tea leaves to alter the intensity of the flavor. If you prefer a stronger tea flavor, consider extending the steeping time by an additional 10-15 minutes before straining.
2. Tempering the Egg Yolks When combining the hot cream mixture with the egg yolks, go slow and steady. This process, known as tempering, prevents the yolks from curdling by gradually increasing their temperature. Pour the hot cream mixture very slowly while whisking continuously.
3. Straining for Smoothness Straining the custard after cooking is crucial for achieving a smooth texture. Even if you don’t see any bits of cooked egg, straining will ensure a silky final product by removing any potential lumps or bits of tea leaves.
4. Chilling Thoroughly Make sure the custard mixture is thoroughly chilled before churning. This is key to achieving a creamy texture when the mixture goes into the ice cream maker. Plan ahead to allow ample chilling time, ideally overnight.
5. Storage and Serving After churning, allow the ice cream to firm up in the freezer for several hours or overnight. When ready to serve, let the ice cream sit at room temperature for a few minutes to soften slightly, making it easier to scoop and enhancing the flavor and texture.
Thai Tea Ice Cream Recipe
My favorite Thai Tea Ice Cream Recipe
Equipment Needed:
1. Saucepan
2. Fine-mesh sieve or cheesecloth
3. Clean bowls (at least two)
4. Whisk
5. Spoon
6. Thermometer (optional, for checking 170°F)
7. Ice cream maker
8. Container with a lid (for storing frozen product)
Ingredients:
- 2 cups heavy cream
- 1 cup whole milk
- 3/4 cup Thai tea leaves
- 1 cup granulated sugar
- 5 egg yolks
- 1 teaspoon vanilla extract
- 1/4 teaspoon salt
- Optional: 1-2 drops of orange food coloring
Instructions:
1. In a saucepan, mix the heavy cream and whole milk. Heat over medium until it begins to steam but do not let it boil.
2. Add the leaves from the Thai tea to the cream mixture. Take the pot off the heat, cover it, and let the tea steep in the cream for half an hour.
3. Pour the mixture through a fine-mesh sieve or cheesecloth into a clean bowl, pressing on the leaves to extract as much liquid as possible. Discard the tea leaves.
4. Infused cream mixture goes back into the saucepan. Add granulated sugar. Heat gently and stir until the sugar dissolves completely.
5. In another bowl, whisk the egg yolks. Gradually add in a cup of the warm cream mixture, whisking constantly to ensure the yolks do not cook.
6. Return the egg yolk mixture to the saucepan containing the cream mixture. Place over low heat and stir constantly until the mixture thickens enough to coat the back of a spoon (about 170°F).
7. Take from the heat and mix in the vanilla extract and salt. If you want colored caramel, add orange food coloring and mix until the color is evenly distributed.
8. Pour the custard through a fine-mesh sieve into a clean bowl to remove any bits of cooked egg.
9. Allow the mixture to cool to room temperature, then cover and refrigerate for a minimum of 4 hours, or overnight, until completely chilled.
10. Churn the custard that has been chilled in an ice cream maker per the manufacturer’s directions. After it has been churned, place it in a container with a lid, and force it to a few hours of a deep freeze before serving, as this will yield the firmest product.